#free coding tutorials
Explore tagged Tumblr posts
Visit Tumblr Blog
Explore Tumblr blogs with no restrictions, modern design and the best experience.
Last Seen Tumblr Blogs


Fun Fact
US Tumblr user growth rate is estimated to slow down to 4.1%.
Text
Top Free Websites to Learn Coding: Become a Developer Without Spending a Dime
Learning to code has never been more accessible, and the best part? You can do it for free! Whether you’re dreaming of building websites, apps, or diving into data science, coding is a skill that opens countless doors. But where do you start? With so many resources out there, it can be overwhelming to choose the right platform. Don’t worry; I’ve got you covered. In this post, we’re diving into…
#beginner coding resources.#best free coding websites#Codecademy courses#coding for beginners#coding skills free#free coding platforms#free coding tutorials#freeCodeCamp coding#full-stack development free courses#learn programming online free#learn to code for free
0 notes
Text
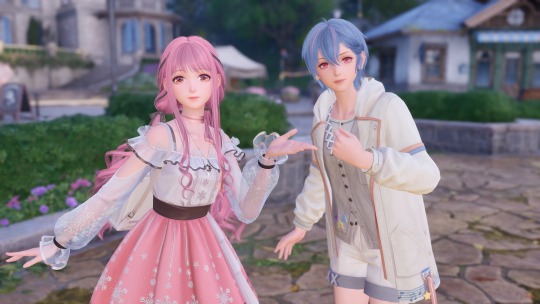

Small test run of Infinity Nikki done! Mostly just finished the tutorial (and kicked Momo around), but it so far it seems pretty fun~
Also photo mode is so nice ♥
#there's some janky animations in those manual progress cutscenes#and after the crash cutscene i had some big lag#but that vanished after progressing the quest#tutorial was somewhat annoying (i hate those “and now click here” ones that refuse to let you do anything else before you finish them)#but didn't take that long#and yeah the photo mode is a godsent for someone used to gpose lol#so many games have pretty graphics but absolutely refuse to let you pose for pics#or god forbid edit colors or lights to make them look better#i can maybe see some of the same problems that shining nikki had#as in. 3d outfits refusing to play nice together when mixing outfits#as that was something i loved doing in love nikki#but so far i haven't got any “you can't use that piece with this outfit” that i remember getting A LOT during shining#anyway uhhhhhh#i should probably come up with a tag for these pics#for organizational purposes u know?#neri in miraland#that'll do#AH also if any mutuals/followers try the game feel free to toss your friend codes my way 👉👈#i've yet to see what the friend system even lets you do but still#infinity nikki#edit: oh right i forgot to clarify - if you walk into momo he kinda shuffles out of your way#and if you keep doing it multiple times he comments something about it lol#i got “okay okay i'll get out of the way!” and something about him need some protective gear lol
9 notes
·
View notes
Text
Every time I go online, I get hit in the face with waves of ableism and mentalism that people don’t even realise they’re doing. So…
You’re not ‘creepy’ or ‘weird’ for having special interests.
You’re not ‘creepy’ or ‘weird’ for mentally behaving younger than you are or not fitting to the societal mould of what’s expected of your age.
You’re in no way a bad person for not being able to have or hold a job.
It is not bad to live with your parents.
It is okay not to have motivation or lack of ability to do things on a daily basis or at all.
It’s okay to listen to your needs and have differing needs from others.
You are allowed to use the internet just like anybody else.
Your condition(s) and symptoms differ from other people’s.
It is okay to have ‘peculiar’ triggers.
You are not a ‘parasite’, you should not in any way be made fun of for your mental and/or physical state. You don’t have to ‘prove them wrong’, you have to listen to your own needs so your health will be well.
#ableism#mentalism#mental illness#physical illness#chronic illness#autism#neurodivergent#depression#trauma#I have a lot of thoughts and experiences but I can’t put them all into word rn#I guess the big thing is that it’s vile how ppl treat and talk about disabled and mentally ill ppl as if it’s a synonym for ‘nasty person’#don’t know how people think it’s in any way acceptable#Also the web is beyond social media? God damn just let me watch Netflix and coding tutorials in peace#Feel free to add to the list btw I probably forgot a lot of things
6 notes
·
View notes
Note
Every time I see your sprite work, it just makes me want to make a sprite edit of Akane with the design I made for her in my "She Was Saved" AU (An AU based on the idea of Akane surviving the events of DRA), but I've never done any sprite work so, do you have any tips?
Ok ok so, first things first, i wanna make it clear that none of my sprites are made from scratch, they're sprite edits, hence why i always tag them as such. Every single one of them used some canon character as a base for the base sprite (that one fitst sprite where the character is just standing there with a simple expression) and a handful even have canon sprites uses as bases for poses. Just figured i should make that clear so there's no confusion here.
While I'm not sure if I'm the best at giving tips n stuff, here's what i could think off;
I think the most important tip i can give anyone who wants to get into sprite editing is MAKE A BUNCH OF LAYERS‼️Save things separately just to be sure rather than merging them because that almost always leads to more time spent later down the line. While the amount of separate things certainly varies from artists to artists here's the one i use for my edits.

The app i use (Ibis paintX) allows me to make folders with a bunch of layers to them so i use them to keep stuff more organized.
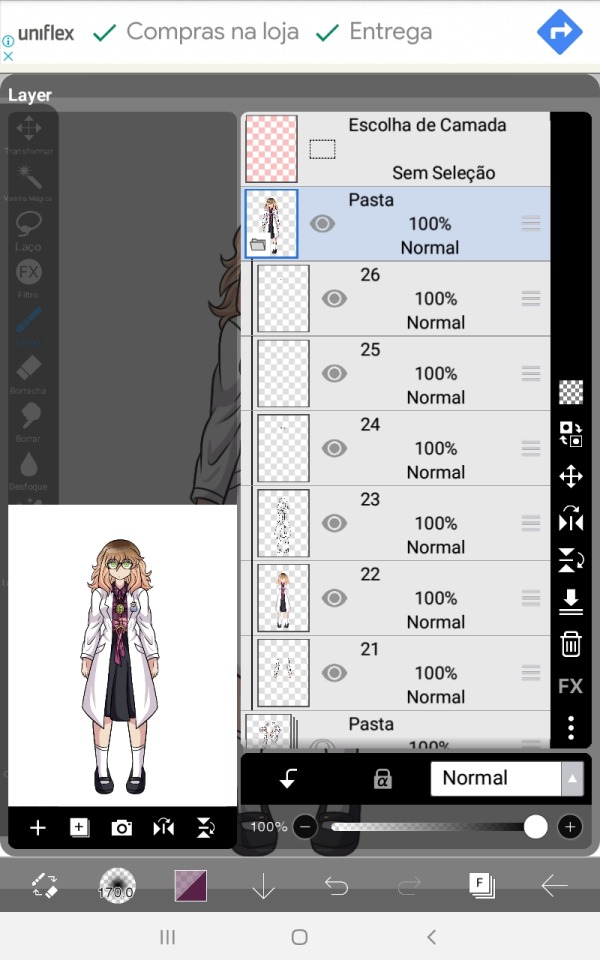
On the first pic well have a folder with the base sprite, one for the different poses and in Beni's case two for the different eyes she has (one for the normal eyes and one for the ones that are part of the glasses, normally i only have one layer with all the eye variants)
On the second image I've opened the folder that holds the base sprite, or should i say just sprite since it's in this folder that i organize everything that belongs to one specific sprite when I'm making them as to not get myself confused. Anyways, you can't see in the screenshots but the first layer has her glasses, second has her eyebrows and mouth and the third has the eyes.
Fourth has the main body lineart and fifth has the main body colors, please keep those separated as by doing so you make it easier to add those lil effects onto the character's faces on certain expressions + having the lineart of the main body always helps when sketching and connecting the different arms to the main body.
Lastly you got the arms, but ideally you should make the arms/poses in a way they can be placed over the body layers since that just makes things easier to put together, i just have this habit of placing the no pose arms under everything else.
When editing i make the different arms and eyes in advance so that when i start making the different sprites i can just duplicate the canva with the first one a thousand times and everything will carry along with those. Saves time in the long-run + you don't need to separate all layers on them (lineart, colors, shading) since they're just parts there's no problem in just merging them together.
A very important thing to note tho i that if the character has glasses or any accessories that you plan on removing or moving around in some pose/sprite this accessory should be made in a different layer from the main body, this makes editing easier than if you had to just erase and refill the part where the accessory was in the sprite you don't want it to be in.
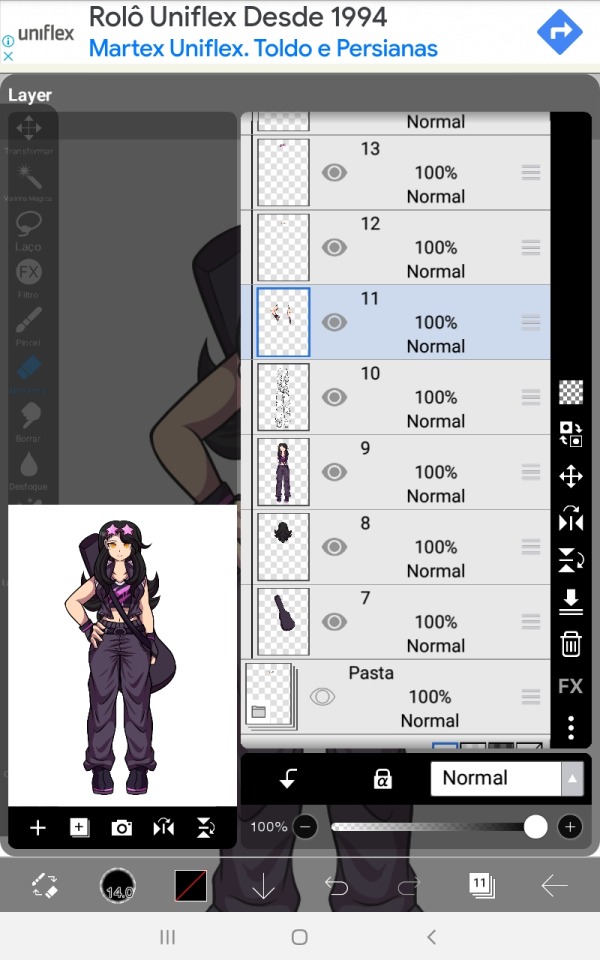
A similar rule should be applied to the character's hair, if they have short or mid length hair you can just add the whole thing to the main body sprite, but if the character's hair is long you should make this bluk/back part of the hair in a separate layer placed under the main body layers. This also apllies to any back accessories.
Here's Akira as an example; she has one layer for her glasses, one for the back/bulk of her hair and one for the guitar case she carries.
These are essentially the basics of if, so let's go over to some actual tips.
Make the sprites on a small canvas.
Since the Danganronpa another games are made on game maker the size of the character sprites is surprisingly small, while I don't think you should just do it on the same canvas size as the actual sprite, it's good to have a smaller canvas so that the lower amount of pixels gives it a look similar to the in-game sprites + as you can see by mine, they don't actually look low quality at all.
(if curious, the go-to canvas size i use for most of my edits is 773x1020)
Use other sprites as references/bases
Especially if you're just starting on making sprites, use the canon ones for bases, references or even just straight up trace them. This will make the sprite look closer to canon and will start making you undertand the elements that make up the style of the sprite, do it enough times and soon enough you'll be able to make poses on your own without needing a sprite from the game as a base.
Remember! What's wrong about tracing is not the act of tracing itself, as the act of doing so is a great exercise to help you learn, the problem is when you do it and claim you made it 100% on your own. Since these are sprite edits, there's not a problem in doing so.
Observe and learn what makes up the style you're trying to replicate
This is hard to talk about since it really is something that comes with practice, I've been making sprite edits for like 5 years now so this stuff is like written on the walls of my brain by now. Just try to look and analyse the sprites and slowly you'll start seeing patterns and small onto them that you didn't noitce before, like how Linuj's sprites have a bit if line weight to them but are still on the thinner side, how he tends to make the hands a bit on the smaller side, how when he color the character's skins he makes the area near the top of the head a lighter shade than the rest of the skintone, the way he usually makes the character's mouths, and even some more complex things like how the male characters will have very little to no eyelashes while the female characters tend to have a whole lot of them, etc.
At the same time, there's no shame in deliberately ignoring some of these things. Personality the small hands REALLY bother me in a few cases and i tend to just make mouth shapes on a whim instead of trying to stay 100% close to the style. It's just a question of messing around and figuring stuff out, it won't look perfect on the first go, but overtime you'll start to get the hang of it.
#i hope this small sprite editing tutorial helps! if you have more questions feel free to send them#these are sorta all i could think of for now#you did mention that these are for an Au Akane so you could also try editing these out of her sprites themselves#instead of making a whole base and multiple parts just pick the sprites and edit the new design over#it could possibly be easier for a beginner? i do feel like making them in this form leads to better results tho#anyways. fun fact! i used the eyelash thing as a subtle form or trans coding on Akira's sprites :]#i love you small details that people won't notice unless pointed out ❤️#hyena ramblings#sprite edit#edit#sprite editing tutorial
21 notes
·
View notes
Text
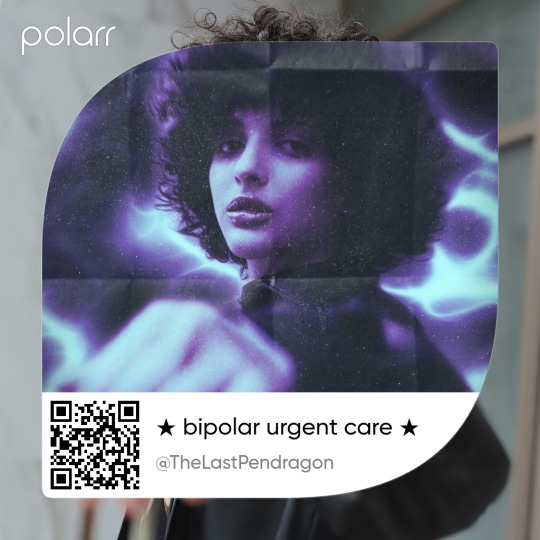
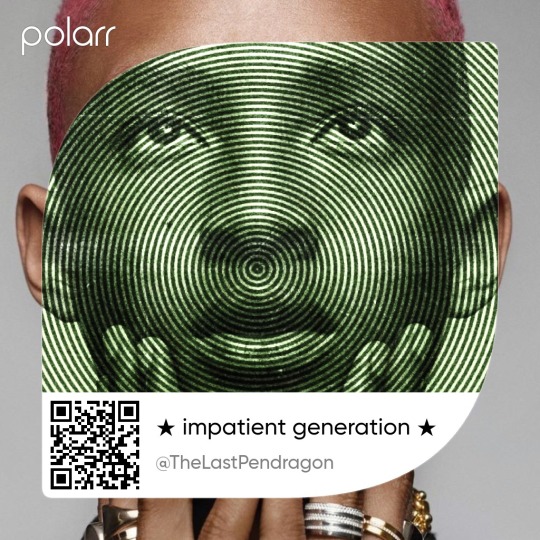
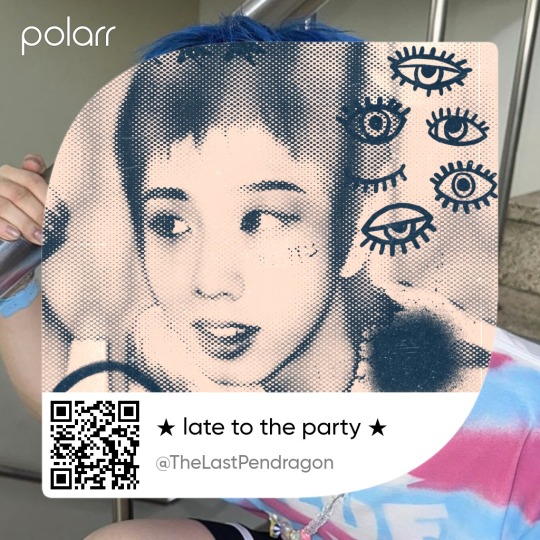
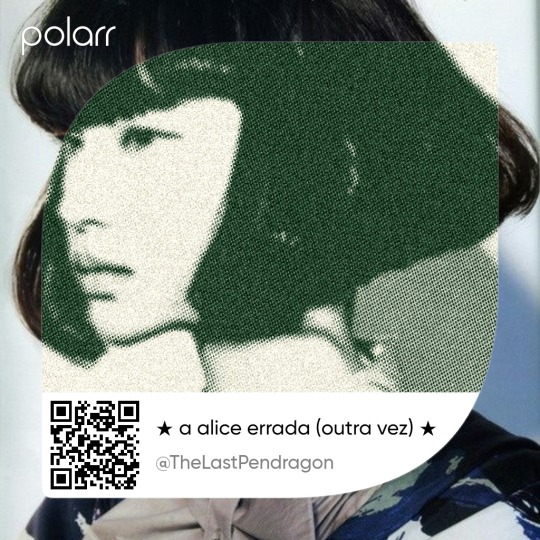
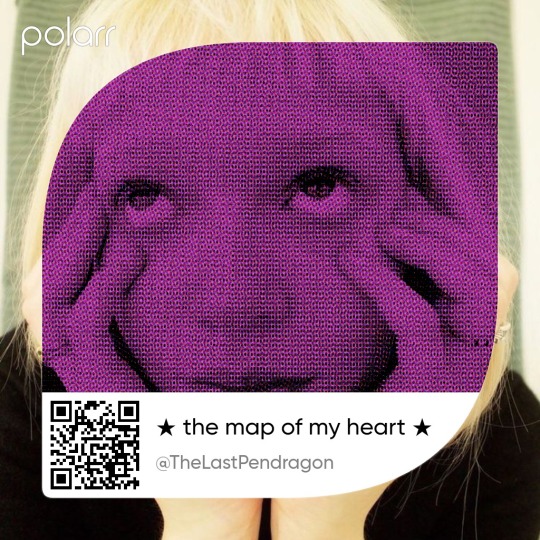
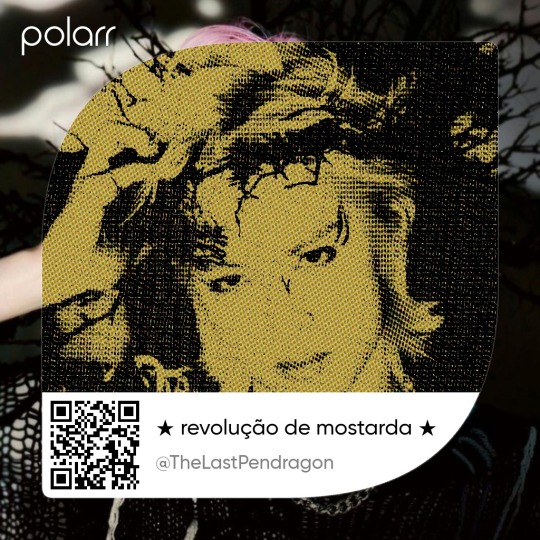
THE COOLEST Y2K GRAPHIC FILTERS (POLARR PACK)

here i am, once again (if you sang "victorious" theme song we should probably marry rn), bringing a new "the coolest pack" and i can genuinely say this is the coolest pack. the filters bring the y2k vibe, specially the graphic design, like magazine and fanzine. i hope you like them. save them below!


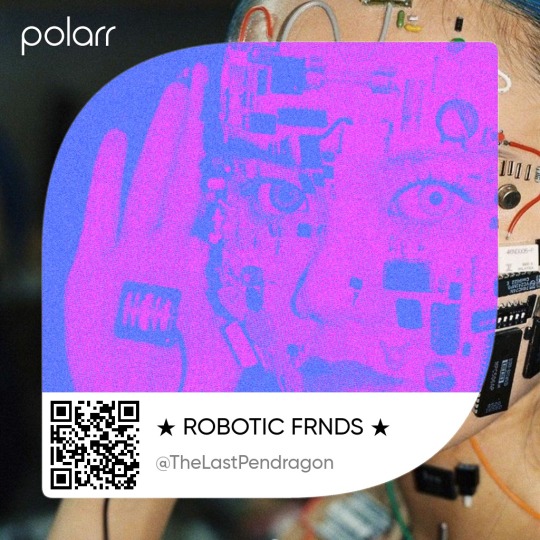


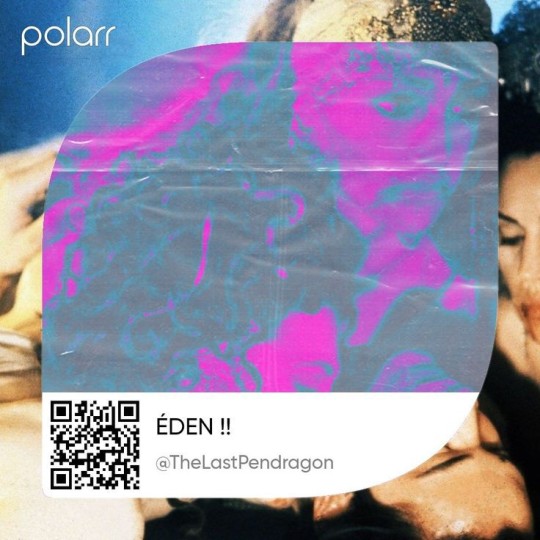

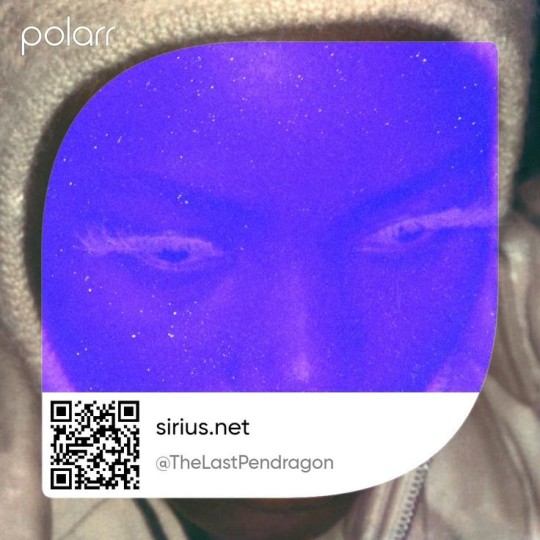

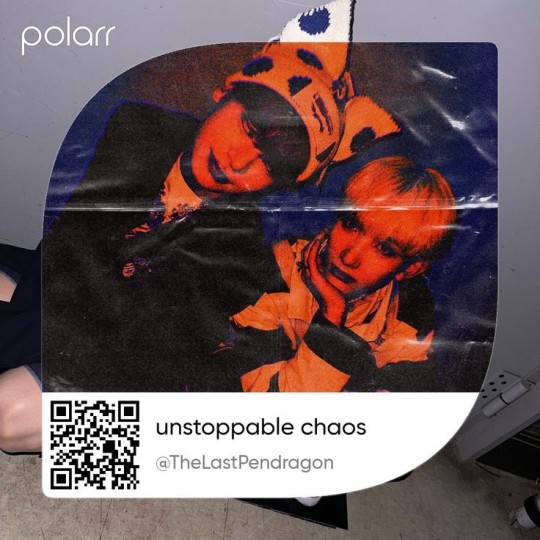
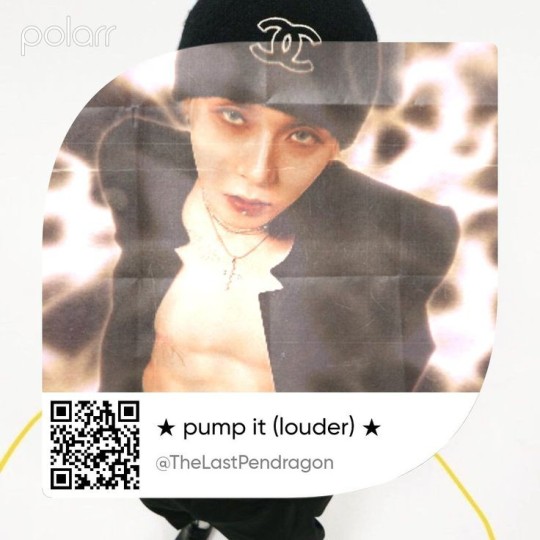
rules: do not use it to make yours, do not claim as yours, only for personal use. this is free, but i'd appreciate like or reblog.
#filter polarr#polarr#polarr filter#code filter#filter code#filtros polarr#polarr code#code polarr#polarr style#style polarr#polarr pack#polarr collection#psd#free psd#free filter#polarr tutorial#polarr effect#made with polarr#filtro#tbz#sunwoo#sunwoo icons#y2k style#cyber y2k#y2k aesthetic#y2kcore#y2k moodboard#y2k magazine#icons with polarr#icons with filter
34 notes
·
View notes
Text
this guy joining Echo in Ninjago Characters I AM Going To Be Thinking About Forever btw.
#ninjago#ninjago liveblog#ninjago okino#They really gave me a side character whos an NPC guide in a video game (but doesnt know it) and then made him Find Out and fall into a#a depression about his entire lifes purpose being for naught and that his entire worldnis fucking fake and then have him break free of his#of his coding and Go To The Real World#im. hes so everything#BUT THE SCENE WHERE HES TRAINING AND FAILING TO PROPERLY GUIDE HIS PLAYERS OVER AND OVER AND OVER BC THEYRE TREATING IT LIKE A GAME BC THEY#BC THEY HAVE MULTIPLE LIVES BUT THEIR DEATHS ARE REAL /TO HIM!!!/ HE HAS TO WATCH ALL THAT AND IT MEANS SOMETHING TO HIM BECAUSE#BECAUSE GUIDING THE PLAYERS IS HIS WHOLE PURPOSE!!!! BUT TO THEM HES JUST THE TUTORIAL HELPER CHARACTER!!! AUAU#i do also like Racer 7. An NPC /programmed to lose/‚ only there to add a challenge to the actual players and yet she NEVER STOPS TRYING...#but she always crashes at the exact same spot in the race. every. time.#AUUGH.
28 notes
·
View notes
Text

So you have a Tumblr account for a long time (or not), but probably you may have a theme that is not supported anymore by its developer, or they just vanished from the face of this earth.
That means that you might be having problems with the new Neue Post Format (NPF) and how is handling new post types.
For more on what went into creating the Neue Post Format, check out Tumblr's Engineering blog post.
I know some-what about coding and even made some themes for Tumblr, though those were for a client so I can share them here.
The goal of this blog is to help:
Fix an old theme that's not behaving well with the new format.
Update some JavaScript knowledge that's breaking your theme.
Update outdated code to better display your theme.
And whatever, if I can help, I will.
AND if you'd like to give me a tip for helping out, that'd be awesome but not require for me to help you. [Ko-Fi not ready yet!]
Please check the READ.ME
⬇️ Versão Português 🇧🇷🇵🇹

Então você tem uma conta no Tumblr há muito tempo (ou não), mas provavelmente você tem um tema que não é mais suportado pelo seu desenvolvedor, ou o dito cujo simplesmente desapareceu da face da Terra.
Isso significa que você pode estar tendo problemas com o novo Neue Post Format (NPF) e como ele lida com novos tipos de postagem.
Para saber mais sobre o que foi necessário para criar o Neue Post Format, confira a postagem do blog de engenharia do Tumblr (em inglês).
O objetivo deste blog é ajudar:
Corrigir um tema antigo que não está se comportando bem com o novo formato.
Atualizar algum conhecimento de JavaScript que esteja quebrando seu tema.
Atualizar o código desatualizado para exibir melhor seu tema.
E tanto faz, se eu puder ajudar, é nóis.
E se você quiser me dar uma gorjeta para ajudar, isso seria ótimo, mas não é necessário para que eu o ajude. [Ko-Fi ainda não tá pronto!]
Por favor, verifique o READ.MEediting
#tumblr theme#tumblr themes#blog theme#blog themes#tumblr glitch#tumblr layouts#theme resources#theme makeover#theme makeovers#tumblr codes#editor#theme#themes#help#pls help#free content#theme change#brblr#html css#theme commissions#tutorial#tumblr issues#editing#layout
5 notes
·
View notes
Text
wanting to make pretty-looking carrds to showcase my different fanganronpa casts in different ways but not knowing jack shit about how to make carrd websites and also having no art or actual writing/work done on any of them just having different characters buzzing in my head
#starboy.exe#feel free to ignore <3#literally just looking at youtube tutorials on how to do carrds and sighing languidly#if i could make games abt these casts you bet your ASS i would#even if they weren't great to literally anyone else i would still love them and that's enough for me.#but as far as actual planning goes i only have like 6 separate full casts rotating in my brain rn#and i literally hate making toyhou.se profiles for them i hate coding i hate everything !!!!!
3 notes
·
View notes
Text
WELCOME TO BOOKMARK-BEAST
Hello im Hank(@killing-machine) and this is the blog where I spam reblog tons of resources and such varying from lifestyle to diy tutorials to recipes to coding or literally anything I think would be useful for someone (or myself)
Ill try and tag shit to keep things properly organized if someone needs to find anything specific but I do actively spam things since I'm always on the hunt for shit so good luck.
You're welcome to submit anything you find that I haven't posted or found yet, take this as like a whole warehouse of tools and books that people can take and donate shit to.
I also make web graphics like stamps, dividers and other things so youre welcome to request things. cant promise ill do them
#beastpost.src -> things i've made
STORAGE TAGS BELOW
art -> help with art from poses, references, tools and etc for traditional, digital, writing and etc
coding -> things for coding and webbuilding including javascript, html, css and misc
computing -> computing help and resources for computers, tech and the web
community -> resources and help for community, politics, and etc
free palestine -> resources to help with palestine
free shit -> downloads and etc from movies to books to games and etc
psa -> public service annoucnements, news, things to be aware of, etc
recipes -> self explainatory; cooking, baking, etc food
tutorials -> self explainatory. general tutorials for a variety of things
web graphics -> web graphics like stamps, blinkies, etc
quality of life -> things to improve life. physical & mental help
#beastpost.src#beast.ask#storage tags ->#art#coding#computing#free shit#free palestine#web graphics#recipes#quality of life#community#tutorials#psa
10 notes
·
View notes
Text
i dont wanna decide on a career unfortunately everyone wants me to soso bad
#i have to have it in. checks watch. 6 months maximum :)#just because i want biomedical something its what im good at and i cant not help people#like thats not some hero complex thing if o dont get motivated by helping people i will be a danger to myself within a couple months#but guys i am fucking ASS at coding. im goated at block coding i always make it past that#but my neocities wont work even tho im basically copy and pasting from html tutorials#i walk into the room and the machine makes it clear that it does NOT fuck with me#maybe i want biomedical research or something thats a little less hands on#or maybe an occupational therapy direction because i learn a lot about disabilities in my free time#or one of the cna or ekg practicum classes i can take through the local college#OR i can pay minimum a couple thousand for coding classes and brute force it#or stay biomedical engineering and focus on improving the mechanical aspects of existing biomed devices without personally coding as much#or veer way off course for something in sustainability#im literally just gonna end up teaching ap bio somewhere lmfao. why are we stressing#< NO hate to ap bio teachers i fuck with you#but i see that shit in my future Vividly#(or i could plan curriculums for teaching biology and standardize methods for courses such as pltw in the real setting ETC ETC ETC)
5 notes
·
View notes
Text
HTML 101: The Ultimate Beginner's Guide to Writing, Learning & Using HTML

HTML serves as the backbone of every web page, allowing us to structure content with paragraphs, headings, images, links, forms, and more. If you're eager to delve into web development or explore the world of coding, mastering HTML is a fantastic starting point.
Join us on webtutor.dev as we unveil the ultimate guide to HTML for beginners. In this comprehensive tutorial, we'll demystify HTML, explore its diverse applications, and equip you with the skills to write your own HTML code. From essential elements to crucial attributes, we'll cover it all.
Get ready to embark on your HTML journey with webtutor.dev – your go-to resource for empowering web development education. Let us dive in and unlock the potential of HTML together.
Join us now on webtutor.dev!
What is HTML?
First published by Tim Berners-Lee in 1989, HTML is now used by 94% of all websites, and probably all the ones you visit. But what is it, exactly?
HTML, short for HyperText Markup Language, is the backbone of the web. It is a markup language that structures the content of web pages. HTML utilizes tags to define the elements and their attributes, such as headings, paragraphs, images, links, lists, forms, and more. These tags instruct web browsers on how to display and render the content to users. With HTML, developers can create interactive and visually appealing web pages. It plays a vital role in creating a seamless browsing experience by allowing users to navigate through hyperlinks and access information across different websites. HTML is the foundation upon which websites are built, providing the structure and organization for displaying text, multimedia, and interactive elements. By learning HTML, individuals can gain the skills to create and customize web pages, making their mark in the digital landscape.
Is HTML a programming language?
No, HTML (Hypertext Markup Language) is not considered a programming language. It is a markup language used for structuring the content and presenting information on web pages. HTML provides a set of tags that define the structure and semantics of the content, such as headings, paragraphs, links, images, and more.
While HTML is essential for web development, it primarily focuses on the presentation and organization of data rather than the logic and functionality found in programming languages. To add interactivity and dynamic behavior to web pages, programming languages like JavaScript are commonly used in conjunction with HTML.
What is HTML Used for?
HTML (Hypertext Markup Language) is used for creating and structuring the content of web pages. It provides a set of tags that define the elements and their layout within a web page. Here are some of the key uses of HTML:
Web page structure: HTML is used to define the structure of a web page, including headings, paragraphs, lists, tables, forms, and other elements. It allows you to organize and present content in a hierarchical manner.
Text formatting: HTML provides tags for formatting text, such as bold, italic, underline, headings of different levels, and more. These tags help in emphasizing and styling specific parts of the content.
HTML Hyperlinks: HTML enables the creation of hyperlinks, allowing you to connect different web pages together or link to external resources. Links are defined using the <a> tag and provide navigation within a website or to other websites.
Images and media: HTML allows you to embed images, videos, audio files, and other media elements into web pages. It provides tags like <img>, <video>, and <audio> for adding visual and multimedia content.
Forms and user input: HTML provides form elements, such as text fields, checkboxes, radio buttons, dropdown menus, and buttons, allowing users to enter and submit data. Form data can be processed using server-side technologies.
Semantic markup: HTML includes semantic elements that provide meaning and structure to the content. Examples of semantic elements are <header>, <nav>, <article>, <section>, <footer>, which help define the purpose and role of specific parts of a web page.
Accessibility: HTML supports accessibility features, such as providing alternative text for images, using proper heading structure, using semantic elements, and other attributes that make web content more accessible to users with disabilities.
Overall, HTML serves as the foundation of web development, providing the structure and presentation of content on the World Wide Web. It is often complemented by other technologies like CSS (Cascading Style Sheets) for styling and JavaScript for interactivity and dynamic behavior.
How to Write HTML?
<!DOCTYPE html><html><head><title>My Page</title></head><body><h1>Hello, World!</h1></body></html>
Explanation:
<!DOCTYPE html>: Specifies the HTML version.
<html>: Opening tag for the HTML document.
<head>: Contains metadata about the page.
<title>: Sets the title of the page displayed in the browser's title bar or tab.
<body>: Contains the visible content of the page.
<h1>: Defines a heading level 1.
Hello, World!: The actual content to be displayed.
Please note that this example is a very basic HTML structure, and for more complex pages, additional tags and attributes would be required.
How to Create an HTML File
To create an HTML file, you can follow these steps:
Open a text editor: Open a text editor of your choice, such as Notepad (Windows), TextEdit (Mac), Sublime Text, Visual Studio Code, or any other editor that allows you to create plain text files.
Start with the HTML doctype: At the beginning of your file, add the HTML doctype declaration, which tells the browser that the file is an HTML document. Use the following line:
<!DOCTYPE html>
Create the HTML structure: After the doctype declaration, add the opening and closing <html> tags to enclose the entire HTML document.
Add the head section: Inside the <html> tags, include the <head> section. This is where you define metadata and include any external resources like stylesheets or scripts. For now, let's add a <title> element to set the title of your page:
<head>
<title>My First HTML Page</title>
</head>
Create the body: Within the <html> tags, include the <body> section. This is where you place the visible content of your web page. You can add various HTML tags here to structure and format your content. For example, let's add a heading and a paragraph:
<body>
<h1>Welcome to My Page</h1>
<p>This is my first HTML file.</p>
</body>
Save the file: Save the file with an .html extension, such as myfile.html. Choose a suitable location on your computer to save the file.
Open the HTML file in a browser: Double-click on the HTML file you just saved. It will open in your default web browser, and you will see the content displayed according to the HTML tags you added.
Congratulations! You have created an HTML file. You can now edit the file in your text editor, add more HTML elements, styles, scripts, and save the changes to see them reflected in the browser.
Common HTML Attributes
<input type="text" name="username" placeholder="Enter your username" required>
<img src="image.jpg" alt="Image description">
<a href="https://example.com" target="_blank">Link to Example</a>
<div id="container" class="box">
<button onclick="myFunction()">Click me</button>
<table border="1">
<form action="submit.php" method="POST">
<select name="color">
<option value="red">Red</option>
<option value="blue">Blue</option>
</select>
Explanation:
<input>: Attributes like type define the input type (text, checkbox, etc.), name sets the input's name for form submission, placeholder provides a hint to the user, and required specifies that the input is mandatory.
<img>: src specifies the image source URL, and alt provides alternative text for the image (useful for accessibility).
<a>: href sets the hyperlink URL, and target="_blank" opens the link in a new tab or window.
<div>: id assigns an identifier to the element, and class adds a CSS class for styling or JavaScript targeting.
<button>: onclick triggers a JavaScript function when the button is clicked.
<table>: border adds a border to the table.
<form>: action specifies the form submission URL, and method sets the HTTP method (GET or POST).
<select>: name assigns the name for the selection input, and <option> defines the selectable options within the dropdown menu.
These are just a few examples, and there are many more HTML attributes available for different elements, each serving specific purposes.
#learn to code for free#coding course online#Online Web Tutorial#learn coding for free#online tutorial#learn code#learn code for free#introduction to coding#learn html#programming training courses#best way to learn coding#how long does it take to learn coding#learn coding for beginners#best online platform for learning coding#best place to learn to code online
4 notes
·
View notes
Text
youtube
Machine Learning Foundations Course - Python, Deep Learning, Linear Regression, MLOps
Learn the essentials of AI with this 8-hour Machine Learning Foundations course, one of the most comprehensive open resources we've published online. Starting from the basics of Python, this course swiftly advances through deep learning and linear regression models to MLOps, seamlessly integrating theory with real-world application. We cap off your learning experience with two exclusive interviews featuring industry experts who discuss launching a successful career in tech with zero experience and the keys to starting and growing your own startup. This course is your gateway to mastering machine learning and propelling your career forward.
#free education#education#Machine Learning Foundations Course#Machine Learning Foundations#machine learning#technology#educate yourselves#educate yourself#data analytics#big data#data analysis#coding#software development#deep learning#python language#python tutorial#python#development#software#education for all#Youtube
0 notes
Text
⭐ So you want to learn pixel art? ⭐
🔹 Part 1 of ??? - The Basics!
Edit: Now available in Google Doc format if you don't have a Tumblr account 🥰
Hello, my name is Tofu and I'm a professional pixel artist. I have been supporting myself with freelance pixel art since 2020, when I was let go from my job during the pandemic.


My progress, from 2017 to 2024. IMO the only thing that really matters is time and effort, not some kind of natural talent for art.
This guide will not be comprehensive, as nobody should be expected to read allat. Instead I will lean heavily on my own experience, and share what worked for me, so take everything with a grain of salt. This is a guide, not a tutorial. Cheers!
🔹 Do I need money?
NO!!! Pixel art is one of the most accessible mediums out there.
I still use a mouse because I prefer it to a tablet! You won't be at any disadvantage here if you can't afford the best hardware or software.
Because our canvases are typically very small, you don't need a good PC to run a good brush engine or anything like that.
✨Did you know? One of the most skilled and beloved pixel artists uses MS PAINT! Wow!!
🔹 What software should I use?
Here are some of the most popular programs I see my friends and peers using. Stars show how much I recommend the software for beginners! ⭐
💰 Paid options:
⭐⭐⭐ Aseprite (for PC) - $19.99
This is what I and many other pixel artists use. You may find when applying to jobs that they require some knowledge of Aseprite. Since it has become so popular, companies like that you can swap raw files between artists.
Aseprite is amazingly customizable, with custom skins, scripts and extensions on Itch.io, both free and paid.
If you have ever used any art software before, it has most of the same features and should feel fairly familiar to use. It features a robust animation suite and a tilemap feature, which have saved me thousands of hours of labour in my work. The software is also being updated all the time, and the developers listen to the users. I really recommend Aseprite!
⭐ Photoshop (for PC) - Monthly $$
A decent option for those who already are used to the PS interface. Requires some setup to get it ready for pixel-perfect art, but there are plenty of tutorials for doing so.
Animation is also much more tedious on PS which you may want to consider before investing time!
⭐⭐ ProMotion NG (for PC) - $19.00
An advanced and powerful software which has many features Aseprite does not, including Colour Cycling and animated tiles.
⭐⭐⭐ Pixquare (for iOS) - $7.99 - $19.99 (30% off with code 'tofu'!!)
Probably the best app available for iPad users, in active development, with new features added all the time.

Look! My buddy Jon recommends it highly, and uses it often.
One cool thing about Pixquare is that it takes Aseprite raw files! Many of my friends use it to work on the same project, both in their office and on the go.
⭐ Procreate (for iOS) - $12.99
If you have access to Procreate already, it's a decent option to get used to doing pixel art. It does however require some setup. Artist Pixebo is famously using Procreate, and they have tutorials of their own if you want to learn.
⭐⭐ ReSprite iOS and Android. (free trial, but:) $19.99 premium or $$ monthly
ReSprite is VERY similar in terms of UI to Aseprite, so I can recommend it. They just launched their Android release!
🆓 Free options:
⭐⭐⭐ Libresprite (for PC)
Libresprite is an alternative to Aseprite. It is very, very similar, to the point where documentation for Aseprite will be helpful to Libresprite users.
⭐⭐ Pixilart (for PC and mobile)
A free in-browser app, and also a mobile app! It is tied to the website Pixilart, where artists upload and share their work. A good option for those also looking to get involved in a community.
⭐⭐ Dotpict (for mobile)
Dotpict is similar to Pixilart, with a mobile app tied to a website, but it's a Japanese service. Did you know that in Japanese, pixel art is called 'Dot Art'? Dotpict can be a great way to connect with a different community of pixel artists! They also have prompts and challenges often.
🔹 So I got my software, now what?
◽Nice! Now it's time for the basics of pixel art.
❗ WAIT ❗ Before this section, I want to add a little disclaimer. All of these rules/guidelines can be broken at will, and some 'no-nos' can look amazing when done intentionally.
The pixel-art fundamentals can be exceedingly helpful to new artists, who may feel lost or overwhelmed by choice. But if you feel they restrict you too harshly, don't force yourself! At the end of the day it's your art, and you shouldn't try to contort yourself into what people think a pixel artist 'should be'. What matters is your own artistic expression. 💕👍
◽Phew! With that out of the way...
🔸"The Rules"
There are few hard 'rules' of pixel art, mostly about scaling and exporting. Some of these things will frequently trip up newbies if they aren't aware, and are easy to overlook.
🔹Scaling method
There are a couple ways of scaling your art. The default in most art programs, and the entire internet, is Bi-linear scaling, which usually works out fine for most purposes. But as pixel artists, we need a different method.


Both are scaled up x10. See the difference?
On the left is scaled using Bilinear, and on the right is using Nearest-Neighbor. We love seeing those pixels stay crisp and clean, so we use nearest-neighbor.
(Most pixel-art programs have nearest-neighbor enabled by default! So this may not apply to you, but it's important to know.)
🔹Mixels
Mixels are when there are different (mixed) pixel sizes in the same image.

Here I have scaled up my art- the left is 200%, and the right is 150%. Yuck!
As we can see, the "pixel" sizes end up different. We generally try to scale our work by multiples of 100 - 200%, 300% etc. rather than 150%. At larger scales however, the minute differences in pixel sizes are hardly noticeable!
Mixels are also sometimes seen when an artist scales up their work, then continues drawing on it with a 1 pixel brush.

Many would say that this is not great looking! This type of pixels can be indicative of a beginner artist. But there are plenty of creative pixel artists out there who mixels intentionally, making something modern and cool.
🔹Saving Your Files
We usually save our still images as .PNGs as they don’t create any JPEG artifacts or loss of quality. It's a little hard to see here, but there are some artifacts, and it looks a little blurry. It also makes the art very hard to work with if we are importing a JPEG.

For animations .GIF is good, but be careful of the 256 colour limit. Try to avoid using too many blending mode layers or gradients when working with animations. If you aren’t careful, your animation could flash afterwards, as the .GIF tries to reduce colours wherever it can. It doesn’t look great!

Here's an old piece from 2021 where I experienced .GIF lossiness, because I used gradients and transparency, resulting in way too many colours.
🔹Pixel Art Fundamentals - Techniques and Jargon
❗❗Confused about Jaggies? Anti-Aliasing? Banding? Dithering? THIS THREAD is for you❗❗ << it's a link, click it!!
As far as I'm concerned, this is THE tutorial of all time for understanding pixel art. These are techniques created and named by the community of people who actually put the list together, some of the best pixel artists alive currently. Please read it!!
🔸How To Learn
Okay, so you have your software, and you're all ready to start. But maybe you need some more guidance? Try these tutorials and resources! It can be helpful to work along with a tutorial until you build your confidence up.
⭐⭐ Pixel Logic (A Digital Book) - $10 A very comprehensive visual guide book by a very skilled and established artist in the industry. I own a copy myself.
⭐⭐⭐ StudioMiniBoss - free A collection of visual tutorials, by the artist that worked on Celeste! When starting out, if I got stuck, I would go and scour his tutorials and see how he did it.
⭐ Lospec Tutorials - free A very large collection of various tutorials from all over the internet. There is a lot to sift through here if you have the time.
⭐⭐⭐ Cyangmou's Tutorials - free (tipping optional) Cyangmou is one of the most respected and accomplished modern pixel artists, and he has amassed a HUGE collection of free and incredibly well-educated visual tutorials. He also hosts an educational stream every week on Twitch called 'pixelart for beginners'.
⭐⭐⭐ Youtube Tutorials - free There are hundreds, if not thousands of tutorials on YouTube, but it can be tricky to find the good ones. My personal recommendations are MortMort, Brandon, and AdamCYounis- these guys really know what they're talking about!
🔸 How to choose a canvas size
When looking at pixel art turorials, we may see people suggest things like 16x16, 32x32 and 64x64. These are standard sizes for pixel art games with tiles. However, if you're just making a drawing, you don't necessarily need to use a standard canvas size like that.
What I like to think about when choosing a canvas size for my illustrations is 'what features do I think it is important to represent?' And make my canvas as small as possible, while still leaving room for my most important elements.
Imagine I have characters in a scene like this:

I made my canvas as small as possible (232 x 314), but just big enough to represent the features and have them be recognizable (it's Good Omens fanart 😤)!! If I had made it any bigger, I would be working on it for ever, due to how much more foliage I would have to render.
If you want to do an illustration and you're not sure, just start at somewhere around 100x100 - 200x200 and go from there.
It's perfectly okay to crop your canvas, or scale it up, or crunch your art down at any point if you think you need a different size. I do it all the time! It only takes a bit of cleanup to get you back to where you were.
🔸Where To Post
Outside of just regular socials, Twitter, Tumblr, Deviantart, Instagram etc, there are a few places that lean more towards pixel art that you might not have heard of.
⭐ Lospec Lospec is a low-res focused art website. Some pieces get given a 'monthly masterpiece' award. Not incredibly active, but I believe there are more features being added often.
⭐⭐ Pixilart Pixilart is a very popular pixel art community, with an app tied to it. The community tends to lean on the young side, so this is a low-pressure place to post with an relaxed vibe.
⭐⭐ Pixeljoint Pixeljoint is one of the big, old-school pixel art websites. You can only upload your art unscaled (1x) because there is a built-in zoom viewer. It has a bit of a reputation for being elitist (back in the 00s it was), but in my experience it's not like that any more. This is a fine place for a pixel artist to post if they are really interested in learning, and the history. The Hall of Fame has some of the most famous / impressive pixel art pieces that paved the way for the work we are doing today.
⭐⭐⭐ Cafe Dot Cafe Dot is my art server so I'm a little biased here. 🍵 It was created during the recent social media turbulence. We wanted a place to post art with no algorithms, and no NFT or AI chuds. We have a heavy no-self-promotion rule, and are more interested in community than skill or exclusivity. The other thing is that we have some kind of verification system- you must apply to be a Creator before you can post in the Art feed, or use voice. This helps combat the people who just want to self-promo and dip, or cause trouble, as well as weed out AI/NFT people. Until then, you are still welcome to post in any of the threads or channels. There is a lot to do in Cafe Dot. I host events weekly, so check the threads!
⭐⭐/r/pixelart The pixel art subreddit is pretty active! I've also heard some of my friends found work through posting here, so it's worth a try if you're looking. However, it is still Reddit- so if you're sensitive to rude people, or criticism you didn't ask for, you may want to avoid this one. Lol
🔸 Where To Find Work
You need money? I got you! As someone who mostly gets scouted on social media, I can share a few tips with you:
Put your email / portfolio in your bio Recruiters don't have all that much time to find artists, make it as easy as possible for someone to find your important information!
Clean up your profile If your profile feed is all full of memes, most people will just tab out rather than sift through. Doesn't apply as much to Tumblr if you have an art tag people can look at.
Post regularly, and repost Activity beats everything in the social media game. It's like rolling the dice, and the more you post the more chances you have. You have to have no shame, it's all business baby
Outside of just posting regularly and hoping people reach out to you, it can be hard to know where to look. Here are a few places you can sign up to and post around on.
/r/INAT INAT (I Need A Team) is a subreddit for finding a team to work with. You can post your portfolio here, or browse for people who need artists.
/r/GameDevClassifieds Same as above, but specifically for game-related projects.
Remote Game Jobs / Work With Indies Like Indeed but for game jobs. Browse them often, or get email notifications.
VGen VGen is a website specifically for commissions. You need a code from another verified artist before you can upgrade your account and sell, so ask around on social media or ask your friends. Once your account is upgraded, you can make a 'menu' of services people can purchase, and they send you an offer which you are able to accept, decline, or counter.
The evil websites of doom: Fiverr and Upwork I don't recommend them!! They take a big cut of your profit, and the sites are teeming with NFT and AI people hoping to make a quick buck. The site is also extremely oversaturated and competitive, resulting in a race to the bottom (the cheapest, the fastest, doing the most for the least). Imagine the kind of clients who go to these websites, looking for the cheapest option. But if you're really desperate...
🔸 Community
I do really recommend getting involved in a community. Finding like-minded friends can help you stay motivated to keep drawing. One day, those friends you met when you were just starting out may become your peers in the industry. Making friends is a game changer!
Discord servers Nowadays, the forums of old are mostly abandoned, and people split off into many different servers. Cafe Dot, Pixel Art Discord (PAD), and if you can stomach scrolling past all the AI slop, you can browse Discord servers here.
Twitch Streams Twitch has kind of a bad reputation for being home to some of the more edgy gamers online, but the pixel art community is extremely welcoming and inclusive. Some of the people I met on Twitch are my friends to this day, and we've even worked together on different projects! Browse pixel art streams here, or follow some I recommend: NickWoz, JDZombi, CupOhJoe, GrayLure, LumpyTouch, FrankiePixelShow, MortMort, Sodor, NateyCakes, NyuraKim, ShinySeabass, I could go on for ever really... There are a lot of good eggs on Pixel Art Twitch.
🔸 Other Helpful Websites
Palettes Lospec has a huge collection of user-made palettes, for any artist who has trouble choosing their colours, or just wants to try something fun. Rejected Palettes is full of palettes that didn't quite make it onto Lospec, ran by people who believe there are no bad colours.
The Spriters Resource TSR is an incredible website where users can upload spritesheets and tilesets from games. You can browse for your favourite childhood game, and see how they made it! This website has helped me so much in understanding how game assets come together in a scene.
VGMaps Similar to the above, except there are entire maps laid out how they would be played. This is incredible if you have to do level design, or for mocking up a scene for fun.
Game UI Database Not pixel-art specific, but UI is a very challenging part of graphics, so this site can be a game-changer for finding good references!
Retronator A digital newspaper for pixel-art lovers! New game releases, tutorials, and artworks!
Itch.io A website where people can upload, games, assets, tools... An amazing hub for game devs and game fans alike. A few of my favourite tools: Tiled, PICO-8, Pixel Composer, Juice FX, Magic Pencil for Aseprite
🔸 The End?
This is just part 1 for now, so please drop me a follow to see any more guides I release in the future. I plan on doing some writeups on how I choose colours, how to practise, and more!
I'm not an expert by any means, but everything I did to get to where I am is outlined in this guide. Pixel art is my passion, my job and my hobby! I want pixel art to be recognized everywhere as an art-form, a medium of its own outside of game-art or computer graphics!

This guide took me a long time, and took a lot of research and experience. Consider following me or supporting me if you are feeling generous.
And good luck to all the fledgling pixel artists, I hope you'll continue and have fun. I hope my guide helped you, and don't hesitate to send me an ask if you have any questions! 💕
My other tutorials (so far): How to draw Simple Grass for a game Hue Shifting
27K notes
·
View notes
Text
ROBLOX GLITCH CODES AND THE LATEST EXPLOITS

Discover the latest Roblox glitch codes to enhance your gameplay. Explore secret tricks and exploits to unlock hidden features, customize your avatar, and improve your gaming experience. Stay updated with the latest Roblox hacks, tips, and exclusive codes to dominate the game.
START NOW FROM HERE
#Roblox#glitch codes#Roblox glitches#free codes#Roblox cheat codes#game hacks#Roblox exploits#promo codes#bug fixes#script codes#glitch tutorials#free items#Roblox tricks#cheat engine#glitch scripts#Roblox tips#error codes#game secrets#bug codes#exploit tools#glitch tips#game cheats#unlock codes#free rewards#Roblox hacks#secret glitches#code list#item glitches#promo glitch#code hacks
0 notes
Note
How is the flash game preservation going?
not much progress if im being real lmao. i was gonna try again to get the games working last week but the internet archive /waybackmachine was down for what, almost a week? and by the time they got restored i got super busy with uni 😣but if i find some time inbetween studies i'll try continue with it next month
#b.txt#ask#i do this on my free time that's why im taking so long with it XD#that and my coding skills are zero to none so i'm just guiding myself with tutorials
1 note
·
View note
Text
0 notes